Showing posts with label blogger tutorial and tricks. Show all posts

Friday, March 18, 2011

Best Tips to Increase Your Traffic Through Comments

index, seo_increase_traffic No Follow versus Do Follow
The comment section of both Blogger and WordPress are NO FOLLOW. Why? This is set this way to prevent spammers flooding any blog, specially to those who are not aware of the technical aspect of blogging. I will let you in a little secret.. there are bloggers or internet marketers who are looking for blogs whose comment section is DO FOLLOW. No idea what is the difference between No Follow and Do Follow? read more about DO Follow VS No Follow here. These marketers search the internet for comment section that are DO FOLLOW.. and making your comment section a DO FOLLOW will gain you a little more traffic than usual.
How to make Blogger blog comment section DO FOLLOW?
  • Go to your dashboard then go to DESIGN
  • Edit you HTML setting but first check the box that says: Expand Widget Templates
  • Press Control F to your keyboard then find the phrase: data:comment.authorUrl’ rel=’nofollow’
  • Change the phrase rel=’nofollow’ to rel=’dofollow’ this will change the attribute of the back links in the comment section.
It does not end there.. to make your blog more attractive to marketers, here’s what you can do:
  • Go to your dashboard and then settings.
  • Go to COMMENTS
  • On the Comment Form Message (scroll down a bit) write something like this: This is a PR3 blog with DO FOLLOW comment section. Comments are moderated.
  • You can also display a badge in your sidebar that says your blog is DO FOLLOW.
How to make WordPress blog comment section DO FOLLOW?
  • Go to your dashboard and click PLUG INS then ADD NEW
  • Search for the plug in: DO FOLLOW, install then activate.
  • Yes, that easy!
Now, to make your blog more inviting to spammers (aka traffic), try changing the phrase in the comment section
  • First look for a single post in your blog then scroll down to the comment section, copy and save the phrase in your comment section (mine says: leave a reply)
  • Go to Appearance then EDITOR, then COMMENTS.
  • Search for the phrase you copied and then change it to a better and more inviting phrase: This is a PR3 blog with DO FOLLOW comment section. Comments are moderated.
Take note that I intentionally use the words PR3, DO FOLLOW, comment section.. since this are the words that most marketers and blog spammers commenter search on the net. If your blog is not PR3, you can just put: Comment section is DO FOLLOW.

Sunday, January 16, 2011

Blogspot Read More and Thumbnail

Blogspot Read More and Thumbnail
Blogger Auto Read more with thumbnail
Expandable post or popularly known as “read more” is a feature that make your blog shows only a part of your posts on index pages i.e. home, labels and archive pages. At the end of each preview there will be a link to the post page, usually attached to the phrase “read more”.

Not too long ago I wrote a tutorial on how to make a “conventional” read more, this time around we will make an auto read more with thumbnail. Before we go on, let me highlight the differences between conventional and auto read more.
Applying auto read more
How to add Blogger Auto Read more with thumbnail?
How to Apply Read More with Thumbnail in Blogger Platform, Follow the Steps:

Step 1. Login to your Blogger account.
Step 2. Go to Dashboard > Design > Edit HTML.
Step 3. Back up your template.
Step 4. Check the Expand Widget Templates check box on top right of the HTML window.
Step 5. In the code window, look for </head> line.
Step 6. Add the Read More code below right after that line.
<!-- Auto read more script Start -->
<script type='text/javascript'>
var thumbnail_mode = "yes"; //yes -with thumbnail, no -no thumbnail
summary_noimg = 430; //summary length when no image
summary_img = 340; //summary length when with image
img_thumb_height = 200;
img_thumb_width = 200;
</script>
<script type='text/javascript'>
//<![CDATA[
function removeHtmlTag(strx,chop){
    if(strx.indexOf("<")!=-1)
    {
        var s = strx.split("<");
        for(var i=0;i<s.length;i++){
            if(s[i].indexOf(">")!=-1){
                s[i] = s[i].substring(s[i].indexOf(">")+1,s[i].length);
            }
        }
        strx =  s.join("");
    }
    chop = (chop < strx.length-1) ? chop : strx.length-2;
    while(strx.charAt(chop-1)!=' ' && strx.indexOf(' ',chop)!=-1) chop++;
    strx = strx.substring(0,chop-1);
    return strx+'...';
}

function createSummaryAndThumb(pID){
    var div = document.getElementById(pID);
    var imgtag = "";
    var img = div.getElementsByTagName("img");
    var summ = summary_noimg;
        if(thumbnail_mode == "yes") {
    if(img.length>=1) {    
        imgtag = '<span style="float:left; padding:0px 10px 5px 0px;"><img src="'+img[0].src+'" width="'+img_thumb_width+'px" height="'+img_thumb_height+'px"/></span>';
        summ = summary_img;
    }
    }
    var summary = imgtag + '<div>' + removeHtmlTag(div.innerHTML,summ) + '</div>';
    div.innerHTML = summary;
}
//]]>
</script>
<!-- Auto read more script End -->
Step 7. After that, find this line: <data:post.body/>
Step 8. Replace the line with this code:
<!-- Auto read more Start -->
<!-- http://www.alljectsart.com -->
<b:if cond='data:blog.pageType == &quot;item&quot;'>
<data:post.body/>
<b:else/>
<b:if cond='data:blog.pageType == &quot;static_page&quot;'>
<data:post.body/>
<b:else/>
<div expr:id='&quot;summary&quot; + data:post.id'><data:post.body/></div>
<script type='text/javascript'> createSummaryAndThumb(&quot;summary<data:post.id/>&quot;);
</script>
<a class='more' expr:href='data:post.url'>Read more ...</a>
</b:if>
</b:if>
<!-- Auto read more End -->Step 9. Click Preview. If it works, then click Save Template and your done.

Customizing the snippet

You can customize the read more by changing the values of the variables below:
  1. thumbnail_mode –set to “yes” if you want to show thumbnail with text summary. Set to other than “yes” to show only text summary.
  2. summary_img –specify the number of characters (including spaces) you want to show in the summary, with thumbnail.
  3. summary_noimg –specify the number of characters (including spaces) you want to show in the summary, when there is no thumbnail.
  4. img_thumb_height and img_thumb_width -specify the thumbnail height and width (in pixels).
  5. You can change the words “Read more” with your own by changing it in line 12 of the code in step 8.
Before you leave:

Do you find this article useful? Share it via Retweet, Share. Any suggestion, question or comment? Please post it in the comments below.

Amazing Post Title Only in Blogger Platform

Display Labels With Post Title Only in Blogspot, Amazing_Post_Title
Display Labels With Post Title Only in Blogspot
Tricks is made to modify the display if the labels click, which show only the post title alone, usually in the label-click does not like this? I usually just snippets such as front page, have read more of what it is for,hehe.. Try to click the label results in this blog.

And to create Display Labels With Post Title Only in Blogspot, you can do as follow below:

1. Log on first Blogger

2. Layout and then select Edit HTML -> check Expand Widget Templates

3. Find code red that placement like this:
<div class='blog-posts hfeed'>

<b:include data='top' name='status-message'/>
<data:adStart/>
<b:loop values='data:posts' var='post'>
<b:if cond='data:post.dateHeader'>
<h2 class='date-header'><data:post.dateHeader/></h2>
</b:if>
<b:include data='post' name='post'/>
4. If the code does not meet the color red can search the following code:
<b:include data='post' name='post'/>
5. have been met? If you are staying to change the red code with the following code:
<b:if cond='data:blog.homepageUrl !=data:blog.url'>
<b:if cond='data:blog.pageType != "item"'>
<a expr:href='data:post.url'>
<data:post.title/></a><br/><br/>
<b:else/>
<b:include data='post' name='post'/>
</b:if>
<b:else/>
<b:include data='post' name='post'/>
</b:if>
6. Save and your done..

Do you find this article useful? Share it via Retweet, Share. Any suggestion, question or comment? Please post it in the comments below.

Tuesday, November 23, 2010

Amazing Blogger-Flatform Favicon Tricks, Tips

Well, not exactly missing favicon, Is your own favicon replaced by Blogger favicon? There had been many complaints about this at favicon for your blog as well as at a newer post free favicon generator and host and I myself experienced the problem.

Fix for missing favicon

Just move your codes for the favicon from it original position in the template to just after ]]> </b:skin>and just before , preview and if everything looks all right, save template.

Actually, I left the original code for the favicon in its original place and copy-paste to just after ]]></b:skin> and just before
This is how that section of the template looks like after the fix:
1st Step: find this html code CTRL+F or ]]></b:skin> see the Picture Below

]]></b:skin>
<!-- iconj.com dynamic favicon code -->
<link href='http://www.iconj.com/favicon.php?user=manature' rel='shortcut icon' type='image/x-icon'/>
<link href='http://www.iconj.com/favicon2.php?user=manature' rel='icon' type='image/gif'/>
<!-- end of iconj.com dynamic favicon code -->
<link href='https://blogger.googleusercontent.com/img/b/R29vZ2xl/AVvXsEiuEvvMoaxXFboZ8jE1SO2SKcGX-KAUG7MdFrkPBliLJjVVyvwJlr-wQB15L4EHer4XuBtvfy17JUzGQDC5u7DovA6fX3PHtCquQIjtWLnP-bNRWT7MEkt8gL7-VrQ6R5n-rDzr_68Hd71K/s1600/n.ico' rel='shortcut icon' type='image/vnd.microsoft.icon'/>
</head>

<body>
Paste the favicon codes immediately after and Your Done: Free Favicon Hosting and Icon Generator

Tuesday, October 26, 2010

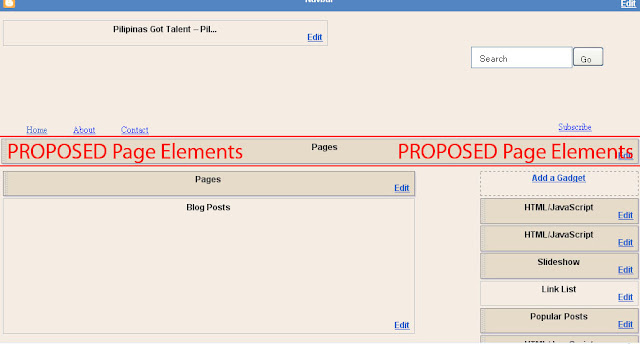
How to Add Page Element below the Menu Link? [Blogger Flatform]

Page_Element
I have a question about Page element; As you can see the above picture, that's i want to do. The Page element should bellow the menu link with same width with the outer-wrapper 980px.

How to Add Page Element Page Navigation Menu?

Tuesday, September 21, 2010

Twenty Essential Blog Directories to Submit Your Blog

20 Essential Blog Directories to Submit Your Blog To; Gaining exposure for your blog is critical to building a following, readership, and revenue. Besides the basic SEO steps of adding compelling and keyword friendly titles, URL structure and descriptions (along with the basic WordPress SEO plugins) basic link building for blogs begins with listing them in blog directories.

There are many paths to consider when building links to your site or blog such as link baiting or blogroll link swapping, but few are as easy to implement and cost effective as submitting to blog directories – and good link juice is essential to a healthy growing blog.

Let us take a look at 20 popular directories worthy of your consideration.
1. Best of the Web Blog Search La Crem de la Crem, Best of the Web’s Blog Directory is very selective and only lists aged and valuable blogs. A link from here is majestic and well deserved.
2. Bloggeries has the best categories and subcategories home page on the internet. The layout is clear and concise, and readers are able to find what they are looking for in a snap!
I am really liking what Rob is doing with Bloggeries and this is bound to be one of the premier Blog Directories on the web.
3. EatonWeb Blog Directory is a real jewel with many aged inbound links and a blog rating system. You may have to pay a fee for your blog to be reviewed, but like Yahoo, the review fee is well worth the few dollars.
4. OnToplist.com is a free human-edited blog directory where you submit the RSS feed of your blog. You can also set up your own micro-directory (blog ranking) and compile a list of your favorite blogs in one place. OnToplist is also a social network that allows you and other bloggers to get in touch and promote your blog by attracting more readers.
5. Blogged.com is an interesting mix of a blog directory and a Google News type site which fuels its news feed from the blogs listed on the site. Blogged.com is very impressive and is free to list your blog.
6. One of the most selective Blog Directories on the web (and WordPress powered), Blog Search Engine is owned by Performancing’s parent company and serves search results powered by IceRocket.
7. Blog Catalog features a vast directory of categories, from academic to writing, while offering the ability to search by country, language, or user. It has a no frills design, but offers convenient member access through simple blog registration.
8. Globe of Blogs has too many features to list. In order to be listed on the site, the blog must not be commercial. The site may appear to be busy, but I like the features of being able to search by title, author, or subject. Narrowing the search becomes easier on this blog.
9. The ultimate directory of British blogs connotes all things British. It is not directed by location, but by the culture! It is asked that bloggers be genuinely “britished.” Being listed in this blog reaches readers all the way across the pond!
10. Blog Universe is the perfect place to promote your video or podcast themed blog. Its layout is easy to navigate. Although the content is limited, it is an all around good directory site worthy of submission.
11. Bigger Blogs is a relatively new blog directory with only a few blogs registered. The blog is intertwined with a business directory. The blog section is difficult to find, and it is located through a link on the right side of the business directory page. However, the benefit is that the earlier you are accepted on a blog directory, the more exposure your blog will obtain. In addition, a back link is indeed a back link, so this can help with your search engine placement.
12. Upon visiting Bloggernity, you find a crisp, clean, and easy to navigate site. Scrolling down, you find the new blogs. As there is little advertising on the home page, it is pleasant to the eye of the reader as well.
13. Bloggapedia has an interesting and eye catching homepage. Readers are easily connected to the top blogs and newest posts. Innovative categories and a colorful design make this blog directory a hit.
14. Spillbean is a well-designed blog directory site with categories such as health, society, internet, and personal. The site is aesthetically pleasing, but there are not many listings yet.
15. Blogging Fusion is a blog with over sixty categories. These categories include photo blogs and family focused blogs. Blogging Fusion has an good amount of blog listings within the directory, and it also has visitor stats available.
16. Blogflux is not only a tool for bloggers, but a directory that has the listings in alphabetic order. The blog listings are organized and clear. It is definitely an effective blog directory in which to be listed.
17. The blogs on the top listings of Bloglisting are fun, colourful, and catch the attention of the reader. Bloglisting displays the page ranking blogs, which is a helpful tool when determining with whom you want to exchange links.
18. Blogio may be a small blog directory with few listings, but it worthy of a submission. Despite its small size, there are quality blogs and a solid ability to search on this site.
19. Blog Explosion claims to be the largest blog promoter on the internet. They have a vast directory but do not seem to have direct links. However, the listing in the directory can still show up in SERP’s, so keep this in mind.
20. Super Blog Directory is a great site that offers tools to posters that others do not. You can see the latest submitted links and blogs on the site, which is a perk that draws traffic into the directory.
The above listings are a glimpse inside the large and vast world of blog directories and the valuable inbound links that your can build for your blog and your business.

How to Add Page Element beside the blog header

There is a way, and it can be done with creating a widget. First you will make a couple of changes to your HTML . You will want to find the Header section. Look for something like this:
#header {
margin: 5px;
border: 1px solid $bordercolor;
text-align: center;
color:$pagetitlecolor;
}
Basically what we are doing is dividing the header up. I'm going to make each side equal, but you can use any proportion you want allowing for the margins. So, replace that code with this:
#header {
width: 300px;
float: left;
margin: 5px;
text-align: center;
color:$pagetitlecolor;
}
#header-right {
width: 300px;
float: right;
color: $pagetitlecolor;
margin: 5px;
padding: 5px;
}
You can adjust these values to fit your template. (It should not equal more than your outer-wrapper.) Almost done! Find this code in your template:
<div id='header-wrapper'>
<b:section class='header' id='header' maxwidgets='1' showaddelement='no'>
<b:widget id='Header1' locked='true' title='YOUR BLOG TITLE (Header)' type='Header'/>
</b:section>
</div>
And replace it with this:
<div id='header-wrapper'>
<b:section class='header' id='header' maxwidgets='1' showaddelement='no'>
<b:widget id='Header1' locked='true' title='YOUR BLOG TITLE (Header)' type='Header'/>
</b:section>
<b:section class='header' id='header-right' showaddelement='yes'>
</b:section>
</div>

Thursday, September 16, 2010

How to Customize Quotes in Blogger

WHAT ARE QUOTES?
Quotes are used for quoting. Heh. Quoting defines:

► repeating or copying the words of another, usually with acknowledgment of the source
► citing or referring for illustration or proof
► repeating a brief passage or excerpt

DEFAULT QUOTES IN BLOGGER AND HOW TO USE THEM
Default quotes ain't much of a fun. Really. They are rather dull. And blank.
When you're composing the Post, and want to make a quotation, you will:

► highlight the part of the text that will be a quote
► and click on the quote button in the Blogger toolbar

SO, WHAT CAN WE DO?
Well, a lot! First, let's see what part of the code (CSS style)..
.post blockquote {
margin:1em 20px;
}
.post blockquote p {
margin:.75em 0;
}
..that's the one! You can find it easily going to LAYOUT ► EDIT HTML ► and scroll until you find it (use CTRL + F to make it easier)... and Replace by the Code Below
}
.post-body blockquote {
line-height: 1.3em;
}
.comment-link {
margin-left: .6em;
}
.post img {
padding: 10px;
}
.post blockquote {
background: #F2F1F1 url(https://blogger.googleusercontent.com/img/b/R29vZ2xl/AVvXsEh1DuDtD0s9s3VyRXQmQsfbC6Qui36GoDfPRm9Z7-lbfowKFJkInejf7oUV7fnyo1Xb421U3-3X1YVP7ebn0eF8vSoDS2CrlwIM7bI2_1Y87v_XEi8lmBU5RukVFSBRvDEy0nFCOHUl3HMC/)top left repeat-y;
margin: 0 20px;
padding: 10px 20px 10px 45px;
border-top: 1px solid #DDD;
border-right: 1px solid #666;
border-left: 1px solid #DDD;
border-bottom: 1px solid #666;
font-size: 0.9em;
}
.post blockquote p {
margin: 0;
padding: 0 0 15px;
}
.post blockquote:hover {
background: #F2F1F1 url(https://blogger.googleusercontent.com/img/b/R29vZ2xl/AVvXsEjOcl8r2vw9ksfmnWUv68tOIV_oSrWEDDaVR400JIxGJLI6SU9lwEZAFpOJqmhefaDNpt4h7uO3fodYMdomrQZJVGCZl-TPRUJlvGs_7UPgpNLgTjJoomqnpzp0RlazUiLD-EoM0g0NACAI/)top left repeat-y;
}
.gapad {
background: #FFF url(https://blogger.googleusercontent.com/img/b/R29vZ2xl/AVvXsEiTKmry1LOTj7DuHEQxlkn21eyE4KBY-eh9V9nB95SIrwo2pNRGwGtN0uliPLmEAL0tDJhun88METUjh0113I4sQwtMOse1Qbtk47f3dyvu_x-p7MpUDFKc3KTOu4wBrMkUg8EGA0I4qqQ/s1600/homepagetop2.gif) top no-repeat;
float: left;
width: 590px;
margin: 0 0 10px;
padding: 10px;
border: 1px solid #DDD;
}
Your Done Save Now..
remember to change the URL address of the pic with your own , you have lots of options here....be creative... trial and error

Wednesday, September 8, 2010

How to Display More Targeted AdSense Ads on Your Web/Blog

AdSense TargetIn the past, your typical blogger would be content enough just having their own blog. But now, bloggers in general are becoming more knowledgeable with ways to monetize their blog and with the availability of free information on the web, they do a decent job.
For example, how many blogs do you read these days that actually don’t have some sort of advertising on it? Not many and for good reason. Why not try and make some money since you spend all this time writing and blogging, right?
Google’s Section Targeting allows you to suggest sections of your blog posts and HTML content that you’d like them to emphasize or downplay when matching ads to your site’s content. By providing Google with your suggestions, you can help them improve your blog’s ad targeting.

How Does Section Targeting Work?

It’s actually quite easy and to implement Section Targeting, you’ll need to add a set of special HTML comment tags to your blog template code. These tags will mark the beginning and end of whichever section(s) you’d like to emphasize or de-emphasize for ad targeting.
The HTML tags to emphasize a page section take the following format:

<!-- google_ad_section_start -->

<!-- google_ad_section_end -->
You can also designate sections you’d like to have ignored like your navigation, sidebar, or anything that’s not worth targeting by adding a (weight=ignore) to the starting tag:
<!-- google_ad_section_start(weight=ignore) -->

<!-- google_ad_section_end -->

Setting Up Section Targeting For Blogger

If you’re familiar with editing Blogger templates then this will be a breeze for you. If not, it’s still rather easy to setup since you’re only dealing with two new lines of code. Before anything, make a backup copy of your current template just in case you mess something up. Next, you’ll want to open your template code in something like notepad or any text editor. You can even edit it right in the Blogger html window but it’s small and harder to search for things.

Now you want to search your template for the <data:post.body/> tag. There should only be one in your entire template. This tag is very important as it prints out your blog posts. It’s the meat of your template code and without it, your blog wouldn’t really work. Next you’ll want to surround this tag with the Google AdSense code. Essentially, we’re telling AdSense whatever text is in your Blogger posts is what it should display relevant ads for.
Here’s what your updated code should look like:
<!-- google_ad_section_start -->
<data:post.body/>
<!-- google_ad_section_end -->
Some people also want to setup Section Targeting for their blog post titles which is fine as well. You basically do the same steps shown here but for the <data:post.title/> tags. There are usually at least two so make sure you wrap them all if you decide to make this change.
Save your template code and load it back into Blogger. Look at your blog and view the page source. You should now see these Google AdSense tags in your code!

Setting Up Section Targeting For WordPress

For WordPress users, you follow the same steps as above but you’ll want to edit the single.php or index.php page. You’re looking for the <?php the_content();?> tag which is equivalent to the <data:post.body/> tag for Blogger. Wrap the Google AdSense tags around the content tag and that’s it.
Here’s what your updated code should look like:
<!-- google_ad_section_start -->
<?php the_content();?>
<!-- google_ad_section_end -->
Now another trick I do is also wrap my comments with the Google AdSense tags as well. Blog comments are a great way to build up additional relevant content to an existing post. Most of the time your comments are very relevant to your post so why not give AdSense more text to use for ad matching? This works especially well if your blog post is short and you’ve got a lot of comments.
To make this change you’ll want to edit your comments.php file and look for the<?php comment_text()?> tag. The modified code should look like this:
<!-- google_ad_section_start -->
<?php comment_text()?>
<!-- google_ad_section_end -->

Extra Tip – Ignore Sections of Your Blog

For any type of blog you can also use the ignore AdSense tag. This is great for sections that are static or don’t really tell Google much about what your blog is about. Like I mentioned briefly above, this would be things like your top navigation, sidebar, or some other advertisements you may be running on your site which are not relative to your blog’s theme and content.
<!-- google_ad_section_start(weight=ignore) -->

<!-- google_ad_section_end -->
Note:
In order to properly implement Section Targeting, you’ll need to include a significant amount of content within the section targeting tags. This means make sure your blog posts are a pretty good length otherwise insufficient content may result in less relevant ads or public service ads and it’s not worth adding these tags. It is also against Google’s AdSense policy to manipulate the ad targeting code to result in ads that are not relevant to the content of your pages. Don’t do it otherwise you risk getting banned from AdSense.

Wednesday, July 21, 2010

How to Make your Blogger Blog ready for Mobile Phones

making your blogger blog mobile friendlyAs you know, millions of people use their mobile phones to access internet. The mobile internet speed is also very fast these days with 3G's , mobile apps,etc.

From this, we can say many of your readers are coming to your blog through mobile phones..But, if you don't make your blog mobile friendly, .you may lose all your mobile readers because in a mobile phone, a normal blog takes lot of time to load and there are other issues that your site not fitting properly in the mobile screen.

So, here is how to make your Blogger (blogspot) blog mobile internet friendly..

Sign into your Blogger account > Design > Edit html

Find this line..
<b:include data='blog' name='all-head-content'/>

Paste this code below that line...


<meta content='IE=EmulateIE7' http-equiv='X-UA-Compatible'/>

<b:if cond='data:blog.isMobile'>

<meta content='width=device-width, initial-scale=1.0, user-scalable=0' name='viewport'/>

<b:else/>

<meta content='width=1100' name='viewport'/>

</b:if>

Saturday, May 29, 2010

Post Title Amaze in Blogger

We already talked about how Google search engine works, and from Matt Cutts’ explanation- it was clear that blog post title has a great role in SEO.
If you are using Blogger, you will observe that the individual post title is separated with a colon after the Blog title. Got it? Well, take a look at the screenshot below.


Tweaking the template to achieve this is very easy. If you find removing the navigation bar easy, what you are going to do now is just as easy as the pie. Just follow these simple steps.

Note: Always backup your template just in case something goes wrong!

1. Find this code in your template:

<title><data:blog.pagetitle></title>

2. Replace that code with this:

<b:if cond= 'data:blog.pageType == &quot;index&quot;'>
<title><data:blog.title/></title>
<b:else/>
<title><data:blog.pageName/></title>
</b:if>

3. Save your template and you’re done!

Now, your individual posts in Blogger will have unique post title.
If you have something in mind, just leave a comment below.

Sunday, April 18, 2010

How to Remove older post and newer post link in Blogger?


In blogger you have this 2 option to view your older post and newer post. But some of you may think your blog may look better if you dont have these two links. There are hacks that will allow you to stop displaying them, but these two links becomes handy in times when you have a lot of blog posts.

  1. Login to your blogger dashboard
  2. Click on Layout
  3. Click on EDIT Html Tab
  4. And find for this piece of code


     #blog-pager-newer-link {
       float: left;
       }
   
    #blog-pager-older-link {
      float: right;
      }
  
     #blog-pager {
      text-align: center;
      }

Now replace the above code with the following code,


    #blog-pager-newer-link {
      display: none;
       }

   #blog-pager-older-link {
     display: none;
     }

   #blog-pager {
     display: none;
     }

     5.Now save your template and your done.

How to Remove Showing Posts With Label In Blogger?


To Remove Showing Posts With Label in Blogger Blogs i.e Show all posts link when we click on the labels link. If you dont like the section below in picture in your blog , then read below how to remove it from your blogger.


Go To Edit Html > Expand Widgets

Search for codes below ☺

       <b:includable id='status-message'>
       <b:if cond='data:navMessage'>
       <div class='status-msg-wrap'>
       <div class='status-msg-body'>
       <data:navMessage/>
       </div>
       <div class='status-msg-border'>
       <div class='status-msg-bg'>
       <div class='status-msg-hidden'><data:navMessage/></div>
       </div>
       </div>
       </div>
       <div style='clear: both;'/>
       </b:if>
       </b:includable>
Copy and Replace the Codes below

       <b:includable id='status-message'>
       <b:if cond='data:navMessage'>
       <div>
       </div>
       <div style='clear: both;'/>
       </b:if>
       </b:includable>

Adding Adsense To Blogger Blog Posts


For adding Adsense to your blog post you have to first convert the Adsense code and then it is possible to add the code to your blog template without any error. Visit the Adsense Ad Code Converter to convert the code.

Now that you have converted the Adsense code by visiting the above link, its time to paste the code in the Blogger template.

Just follow the steps given below:

1 Step:     
Now search the following code in the template [Press Ctrl+F and Paste the code below]

                    <data:post.body/> 
2 Step:
If you want to display the ads at the start of the post, then paste the code above <data:post.body/> and if you want to display the ads at the end of the post, then paste the code below it. However you will have to add the Adsense code between two lines of code before adding it to the template.

<b:if cond='data:blog.pageType == &quot;item&quot;'>
Paste the Adsense Code here
</b:if>

The main reason for pasting the Adsense code between the 2 lines is that it wont display the ads on the Home Page. The ads will be visible only when you visit the blog post. This is important as Google allows only 3 ad units per page. Most of the blogs display 5 posts per page, because of which 5 ad units will be visible on the Home Page which is against the rules. But if you want to display the ads on the Home Page and have only 3 or less posts per page, then you don't need to add the above code to your Adsense code.

Now save the template and check your blog posts. The adsense code will be visible in the posts.               

Thursday, April 15, 2010

Best Tips to Get traffic from Image Search Engines


How to Get traffic from Image Search Engines

Posted by Saad Hamid on May 23, 2007

I was searching Google Images for some images today and I found that 80% of the images that I needed were indeed hosted on blogs from all around the web. One important thing that I would want most bloggers to notice is that the search engine bots e.g. Google Bot do not only crawl your content but also your blog images and completely index them in their Image Search.

Traffic From Image Search Engines

Many bloggers underestimate the traffic driving power of self-hosted images or in most cases do not even know the huge impacts of hosting images on their blog. Here is a list of reasons why bloggers prefer not to host images on their blog:

1. They Think They Save Bandwidth

Trust me the world is not at your shoulders. You are not going to do any good by saving your blog bandwidth. If you think that by saving your bandwidth you are making future investments or helping the poor then you are absolutely out of your mind. This is the virtual world, the web world, and here no one is poor or rich. By not hosting images on your blog you are straight away telling search engine bots "I don't want traffic please don't crawl me"

2. They Think They Save Time

If you think that the world is relying on you to give your precious little time to them, better think again. I don't think that getting free quality traffic from search engines at the cost of 5-10 minutes extra work on your blog is going to do heavy losses to you. By hosting images on your blog you are not only getting traffic but saving your future time which may get exhausted in heavy search engine optimizations.

3. They Think Its Easy

Hosting your images on services like Photobucket, ImageShack and Flickr and then using the generated codes to show those pictures/images on your blog huh? You call that easy? If you are using either of Wordpress or Blogger platform for your blogging needs then hosting an image is just easy as click of a button so don't waste your time doing uploading elsewhere and then copying codes to show your images.

4. They Think Its Safe and Secure

I agree to some extent with the fact that hosting images on services like Photobucket, ImageShack or Flickr is 100% safe as there is very little chance for you to lose any image ever but if you have a decent host then most likely you won't lose your images from your server too. After all Image hosting services are also run on normal dedicated hosts and not something out of the skies. DreamHost is the most reliable host I know especially for bloggers so if you have your blog hosted with them or with hosts of similar potential then hosting images on your own blog is totally safe and you should not worry a pint about losing your images or about their security.

Tips To Build Traffic From Search Engines

Now that you know what bloggers are mainly afraid of in hosting their images on their blog and its relative impacts let us discuss some tips which can help us assure that search engine bots index our images in image search results.

1. Start Uploading Images On Your WebHost

This is the key to the door which brings in your traffic. For a search bot its not the page where the image was found and crawled rather the server or host or site where the image is apparently located. Make an upload folder on your blog and start uploading the images you use in that particular folder so whenever a bot crawls your pages it indexes your images on image search engines and gets you traffic.

Uploading images on your server means you are communicating with the image-search bots in a I-Have-It-Come-Get-It tone.

2. Use Good Keyword names For Your Images

If you have an image of Google logo in JPEG format and you save it with the name 1.jpeg just think yourself how will the innocent image-search bot will know what the image is about? and certainly it will tag the image for the keyword "one" or "1" instead of "Google logo".

In this case you lose your real site traffic too and get ranked for unmatched keywords which is just destroying your Search Engine Ranking Position structure and doing you no good at all. So be creative and give your images names which actually match to what they really are.

3. Use The 'alt' attribute in Image Tags

Just like the Image name there is another important factor that the image search bots keep in mind while ranking your images for a certain keyword.

Its the very sweet 'alt' attribute which most of us do not use in our Image tags because we want to save our time or mainly because we think its useless. The 'alt' attribute is very important to place while writing the tag code for your image as it servers another keyword targeting purpose for image search bot.

It can be the same as the Image name but is targeted by image search bots for the purpose of ranking your images for a keyword.

4. Enable Google Enhanced Image Search

As Google is the primary search engine everyone uses and talks about. Its good if you use the Google Enhanced Image Search functionality in your Google Webmaster Dashboard to take use of this feature and rank your images higher in Google Image Search.

To enable the images on your site to be used with these types of tools, simply, access the site in webmaster tools, then choose Diagnostic > Enhanced Image Search. Once you have opted-in, you can opt-out at any time by returning to this page and clearing the checkbox.

5. Enable Access To The Image Uploads Folder

Make a robots.txt file in your main blog directory or most probably you will already have one. Just allow access to the search engine bots to your Image Uploads Folder so they can crawl your directories and enlist the images more properly and accurately.
I hope the article was useful and informative.

Saturday, April 10, 2010

Update Search Engines and RSS Trackers in ONE-CLICK

How can you update multiple search engines, RSS feed tracking services and blog directories about your latest blog article. Blog and Ping! There are many ping lists available and many pinging tools which can do this in one click.

Pinging lets dozens of services which specifically track and connect blogs to know you�ve updated so they can come check you out. I was using Pingomatic for several months, but maybe it has become so popular with bloggers, that it many times does not connect for me or works very slow. So what are alternatives to Pingomatic?

One Click Multiple Blog Services Pingback Tools

  • Pingomatic – the most popular. Pings several popular services and specialized services. Create a bookmark for each ping url.
  • Pingoat – Pings a huge collection of 52 blogging services, including special services and non english tracking services. You can easily select all services by selecting the category.
  • King Ping – Pings multiple services – 18 in all. Easy to check and uncheck boxes. And you can also create a bookmark with your settings.
  • Blogflux Pinger – Pings 32 services, including several specialized services and language specific services too.
  • Feedshark - Ping, submit, & promote your blog, feed, or podcast for free to multiple services.
  • BlogBlip – Just enter the blog url and it will submit to 15 popular blog tracking services.
  • Ping The Empire – Pings 18 common blog tracking services.
  • Pingates – pings 37 services including several many Japanese ones
  • Ping.In – notifies several Blog Search Engines and blog directories, much like pingoat.
  • Autopinger – will automatically ping your selected blog services. Has a XML-RPC interface too.

Ways to Get Your Blog Indexed by Google in 24 Hours

How can you get your blog indexed by Google in 24 hours? There is a lot of conflicting search engine optimization information available, especially when it comes to trying to beat the natural ranking systems and having your blog rank high in Google right from the start. While it’s possible to make a blog and have it indexed almost straight away, most people go about doing so with a poor overall strategy for success.

Ranking high on Google is all about long-term thinking, and going out to win everything in the first day will often see you wasting time and opportunity without getting anything in return. However, it’s very much possible to be indexed by Google in 24 hours or less. After you make a blog, just follow these simple ideas and you’ll see your website show up in the search results within a day.

1: Submit your blog to Google

Obviously you’ve got to submit your new blog to Google before it can be indexed. Some free blogging platforms will submit your blog for free, while others, especially self-hosted blogging platforms, require you to do it yourself. Either way, it’s an easy 5-minute job that can be done alongside other, more time consuming tasks. Use the Google webmasters tools to verify your site. Here’s how:
Step 1: Go to google.com/webmasters. Sign in using your Google Account or create an account if you don’t have one already.
Step 2: Add your blog site by clicking the “Add a site” button. Then type in the domain name you wish to add, and click “Continue”.
Step 3: Once added you will need to verify that you own this site. This can be done one of two ways, Meta Tag or Upload a HTML file. The Meta Tag way is, by far the easiest.
Step 4: Meta Tag verification. This method requires you to add a piece of code to your header.php file. Copy the Meta Tag code Google has asked you to copy to your blog site.
Step 5: In your WordPress dashboard go to “Appearance”, then “Editor” using the menu tabs on the left hand side.
Then click on Header (header.php) on the right hand side to open up the header template. Find the tag highlighted, and BELOW it “paste” in the verification Meta tag Google has given you.
Step 6: Then scroll down and click on “Update File”
Step 7: Go back to the Google Webmasters Tool website and click “Verify” and Google will confirm that you own the site.
Step 8: After verifying, Google will display a confirmation page.

Sunday, March 28, 2010

Rotating Banner to Your Site or Blog

Javascript Banner Rotator
The use of a banner rotator can be used for several purposes. A couple of examples would be to give your site a fresh look by rotating your site logo, and showing your site sponsors advertisement banners in a certain location within a page.

The tutorial below will teach you how to create your own banner rotator script using javascript. At present the script is set to rotate 3 different banners and place the banner at the center of the top of the page. However with some modifications to the javascript code you can change this to suit your needs.

Please visit the webmaster forum if you experience any problems.

Select all (Ctrl + A) the text script below and copy it to your clipboard (Ctrl + C).

Open a your webpage that you want your rotating banners to appear on, in a program such as Wordpad or Notepad and paste the above text (Ctrl + V) in the location that you want your banners to appear.

Edit the RED text only to reflect your information.


<SCRIPT LANGUAGE="JavaScript">

<!-- BANNER ROTATOR

var how_many_ads = 3
var now = new Date()
var sec = now.getSeconds()
var ad = sec % how_many_ads;
ad +=1;

//***************** AD NUMBER ONE ****************

if (ad==1){

url="http://www.youradvertiser.com";

alt="Advertiser Number One";

banner="http://www.yourdomain.com/images/banner1.gif";

width="468";
height="60";
}

//***************** AD NUMBER TWO ****************

if (ad==2){

url="http://www.youradvertiser.com";

alt="Advertiser Number Two";

banner="http://www.yourdomain.com/images/banner2.gif";

width="468";
height="60";
}

//***************** AD NUMBER THREE ****************

if (ad==3){

url="http://www.youradvertiser.com";

alt="Advertiser Number Three";

banner="http://www.yourdomain.com/images/banner3.gif";

width="468";
height="60";
}

document.write('<center>');
document.write('<a href=\"' + url + '\" target=\"_blank\">');
document.write('<img src=\"' + banner + '\" width=')
document.write(width + ' height=' + height + ' ');
document.write('alt=\"' + alt + '\" border=0><br>');
document.write('</center>');
-->
</SCRIPT>


After you have embedded the script into your page within the <body> tags, where you want your banners to appear you are ready to upload
your pages!

Saturday, March 27, 2010

How to Add Meta Tag to Blogger?

Meta Tag
What is Meta Tag?
Meta elements are HTML or XHTML elements used to provide information about a Web page or a blog. Meta tags is placed in the head section of an HTML or XHTML document. Meta tag is used to specify the page author, page description, page keyword. Look at the following image. Here the description after title is what i used as meta tag in my blog.

Steps To Add Meta Tag

Step 1: Login to Blogger.com then go to Dashboard.

Step 2: Go to Layout Tab.

Step 3: Go to Edit HTML tab.
You have to insert the following code.

<meta content='DESCRIPTION HERE' name='keywords'/>
<meta content='KEYWORDS HERE' name='description'/>
<meta content='AUTHOR NAME HERE' name='author'/>

DESCRIPTION HERE: Insert description of your blog or site here.
KEYWORDS HERE: Kewords that describe your blog well.
AUTHOR NAME HERE: Your name or Blogger name.

Step 4: Now find out the following line:

Step 5: Now insert the meta tag after the above line.
Please Save and You are done. I hope i can help you a little.

Friday, March 26, 2010

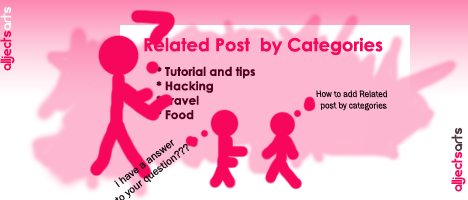
How to Add Related Post by Categories in Blogger

How to Add Related Post by Categories in Blogger,Google
Recently i found a page it has some related posts according to user defined categories or labels. I’m surprised, because normally this feature in wordpress and some blogger has widget but it isn’t show correct way.

This widget shows posts under different labels, categories or tags. You can customized it.

Follow the specific instructions below to add this hack widget to your blog.

1: Go to Blogger Dashboard>Edit Layout>Edit HTML
2: Then Check the ‘expand Widgets Template Box’

3: Then Search (Ctrl+F) the code given below in your template:
<data:post.body/>
4:Copy the code and paste it below.

<b:if cond='data:blog.pageType == "item"'>
<div class='similiar'>
<div class='widget-content'>
<h3>Related Posts by Categories</h3>
<div id='data2007'/><br/><br/>
<script type='text/javascript'>
var homeUrl3 = &quot;<data:blog.homepageUrl/>&quot;;
var maxNumberOfPostsPerLabel = 4;
var maxNumberOfLabels = 10;
maxNumberOfPostsPerLabel = 100;
maxNumberOfLabels = 3;
function listEntries10(json) {
var ul = document.createElement(&#39;ul&#39;);
var maxPosts = (json.feed.entry.length &lt;= maxNumberOfPostsPerLabel) ?
json.feed.entry.length : maxNumberOfPostsPerLabel;
for (var i = 0; i &lt; maxPosts; i++) {
var entry = json.feed.entry[i];
var alturl;
for (var k = 0; k &lt; entry.link.length; k++) {
if (entry.link[k].rel == &#39;alternate&#39;) {
alturl = entry.link[k].href;
break;
}
}
var li = document.createElement(&#39;li&#39;);
var a = document.createElement(&#39;a&#39;);
a.href = alturl;
if(a.href!=location.href) {
var txt = document.createTextNode(entry.title.$t);
a.appendChild(txt);
li.appendChild(a);
ul.appendChild(li);
}
}
for (var l = 0; l &lt; json.feed.link.length; l++) {
if (json.feed.link[l].rel == &#39;alternate&#39;) {
var raw = json.feed.link[l].href;
var label = raw.substr(homeUrl3.length+13);
var k;
for (k=0; k&lt;20; k++) label = label.replace(&quot;%20&quot;, &quot; &quot;);
var txt = document.createTextNode(label);
var h = document.createElement(&#39;b&#39;);
h.appendChild(txt);
var div1 = document.createElement(&#39;div&#39;);
div1.appendChild(h);
div1.appendChild(ul);
document.getElementById(&#39;data2007&#39;).appendChild(div1);
}
}
}
function search10(query, label) {
var script = document.createElement(&#39;script&#39;);
script.setAttribute(&#39;src&#39;, query + &#39;feeds/posts/default/-/&#39;
+ label +
&#39;?alt=json-in-script&amp;callback=listEntries10&#39;);
script.setAttribute(&#39;type&#39;, &#39;text/javascript&#39;);
document.documentElement.firstChild.appendChild(script);
}
var labelArray = new Array();
var numLabel = 0;
<b:loop values='data:posts' var='post'>
<b:loop values='data:post.labels' var='label'>
textLabel = &quot;<data:label.name/>&quot;;
var test = 0;
for (var i = 0; i &lt; labelArray.length; i++)
if (labelArray[i] == textLabel) test = 1;
if (test == 0) {
labelArray.push(textLabel);
var maxLabels = (labelArray.length &lt;= maxNumberOfLabels) ?
labelArray.length : maxNumberOfLabels;
if (numLabel &lt; maxLabels) {
search10(homeUrl3, textLabel);
numLabel++;
}
}
</b:loop>
</b:loop>
</script>
</div>
</div>
</b:if>

5: Now your done Save your Template. Whola !!!
I Hope i can help you with this simple tricks